 Say Cheese!
One thing I really miss about being back on the east coast is the size and portion of the artery-hardening foods there! I went to college in Connecticut, but it was only an hour train ride to downtown Manhattan and all the decadence feast havens! In the city when you ordered a cheesecake; it meant you got a cheesecake-no-if -and-or-buts. And a piece of cheesecake meant a portion thick enough to sit comfortably on the plate served with whipped cream and a sweetened fruit sauce. Unfortunately, since Ive moved to Japan I've had to maneuver my way through endless cake shops in Tokyo, only to find ones which serve what they only imagine to be a cheesecake, but is in actuality merely an inexcusably thin, floppy, wannabe new yorker. I longed for a real New York-style cheesecake...you know, the kind that makes a shearing sounds as you man-handle it with a fork and one with a rich cheesiness seductiveness that would make even Lady Gaga blush with decadence.
There were only a few places that served a decent cheesecake in Japan, but again you were paying through the nose for the prices in comparison to the wimpy portion.
I told my cooking students to get ready for a Cheesy Revelation. Also, to add hurt to injury, I decided to include Philly Cheese Steak sandwiches, which everyone knows is a cheesy concoction of thinly sliced meat, peppers, onions, and cheese galore, saddled between an Italian bread roll all of which would make a horses heart stop.
New York-Style Baked Ricotta Cheesecake
Ingredients
2 pounds ricotta cheese
2/3 cup white sugar
1/3 cup all-purpose flour
6 eggs
1/4 teaspoon ground cinnamon
2 teaspoons orange zest
2 teaspoons vanilla extract
1/8 teaspoon salt

 Directions
1. Preheat oven to 300 degrees F (150 degrees C). Set rack in the middle of the oven. Butter and flour a 9 1/2 inch spring form pan, and tap out excess flour.
Ingredients
2 pounds ricotta cheese
2/3 cup white sugar
1/3 cup all-purpose flour
6 eggs
1/4 teaspoon ground cinnamon
2 teaspoons orange zest
2 teaspoons vanilla extract
1/8 teaspoon salt
Directions1. Preheat oven to 300 degrees F (150 degrees C). Set rack in the middle of the oven. Butter and flour a 9 1/2 inch spring form pan, and tap out excess flour.

2. Place the ricotta in a large mixing bowl, and stir it as smooth as possible with a rubber spatula. Stir the sugar and flour together thoroughly into the ricotta. Stir in the eggs 1 at a time. Blend in the vanilla, cinnamon, orange zest, and salt. Pour batter into the prepared pan.

3. Bake in the center of the oven for about 1 1/4 to 1 1/2 hours, until a light golden color. Make sure the center is fairly firm, and the point of a sharp knife inserted in the center comes out clean. Cool on a wire rack. It will sink slightly as it cools. Cover, and chill till serving time.
Ingredients食材

リコッタチーズ 900g
グラニュー糖 150g
小麦粉 50g
卵 6個
シナモン (粉末) 小さじ ¼
オレンジゼスト(皮のすり卸し) 小さじ2
バニラエッセンス 小さじ2
塩 ひとつまみ
Directions調理方法
1.
オーブンを150度に予熱しておき、中段にセットする。底抜けタイプの23cmのケーキ型にバターを塗り、小麦粉をまぶす。
2.
大きなボウルにリコッタチーズを入れ、パレットナイフで出来るだけ滑らかにする。


 3.
3.グラニュー糖と小麦粉をチーズに混ぜ合わせたら、卵を1つずつ混ぜ込む。バニラ、シナモン、オレンジゼスト、塩を混ぜ入れ、ケーキ型に流し込む。
4.

型をオーブンの中央に置き、薄いきつね色になるまで1時間15分~1時間30分焼く。ケーキの真ん中がしっかり固まり、竹串を刺してきれいに抜くことができるまで焼く。網の上で冷ます。中心部は冷めるに従い、窪んでくる。ラップをして冷蔵庫で冷やす。

 Original Philly Cheese Steak Recipe
Ingredients:12 ounces boneless beef rib eye steak2 tablespoons margarine or butter2 medium onions, thinly sliced and separated into rings1 medium red or green sweet pepper, cut into thin strips4 French rolls or hoagie buns, split4 ounces thinly sliced cheddar cheese
Directions:
Partially freeze beef. Thinly slice beef across the grain into bite size strips. In a 10 inch skillet melt margarine or butter; add onions and pepper. Cover and cook over medium low heat about 10 minutes or until tender, stirring occasionally. Remove onion pepper mixture from skillet with a slotted spoon. If necessary, add additional margarine to skillet. Add beef; cook and stir over medium high heat for 2 to 3 minutes or until done. To serve, spread rolls open face on a baking sheet. Divide beef and onion pepper mixture among rolls. Top with cheese. Broil 4 to 5 inches from the heat for 1 to 2 minutes or until cheese is melted. Serve immediately.
 We also made some fresh tomatoe Bruschettes with the extra french bread They complimented the heaviness of the sandwiches well.
 Thanks to everyone for coming. Let's take a picture together, so say...."Velvetta!"


 Everyone got a 'kick' out of this because they had never done it before.
  You don't have to be "light on your feet" nor the greatest dancer to enjoy kneading the dough by tip^toeing gently across the dough.
 The purpose is to remove the air pockets from the first Nekase(resting) and to soften the noodles to a more elastic state.(


 NOTES : For Kamaage-Udon : It's better that the boiling time is shorter than usual.


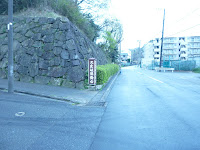


 and the start of the hiking trail


 from the South entrance of the park it's only a twenty minute walk back to Kamiooka station if you take a short-cut over the hill and past Maito Elementary school.
 There was an interesting cemetery at the top of the hill. Because it had a view of the surrounding mountain side the plots themselves are very expensive. Your eternal resting place needs a view, I guess.
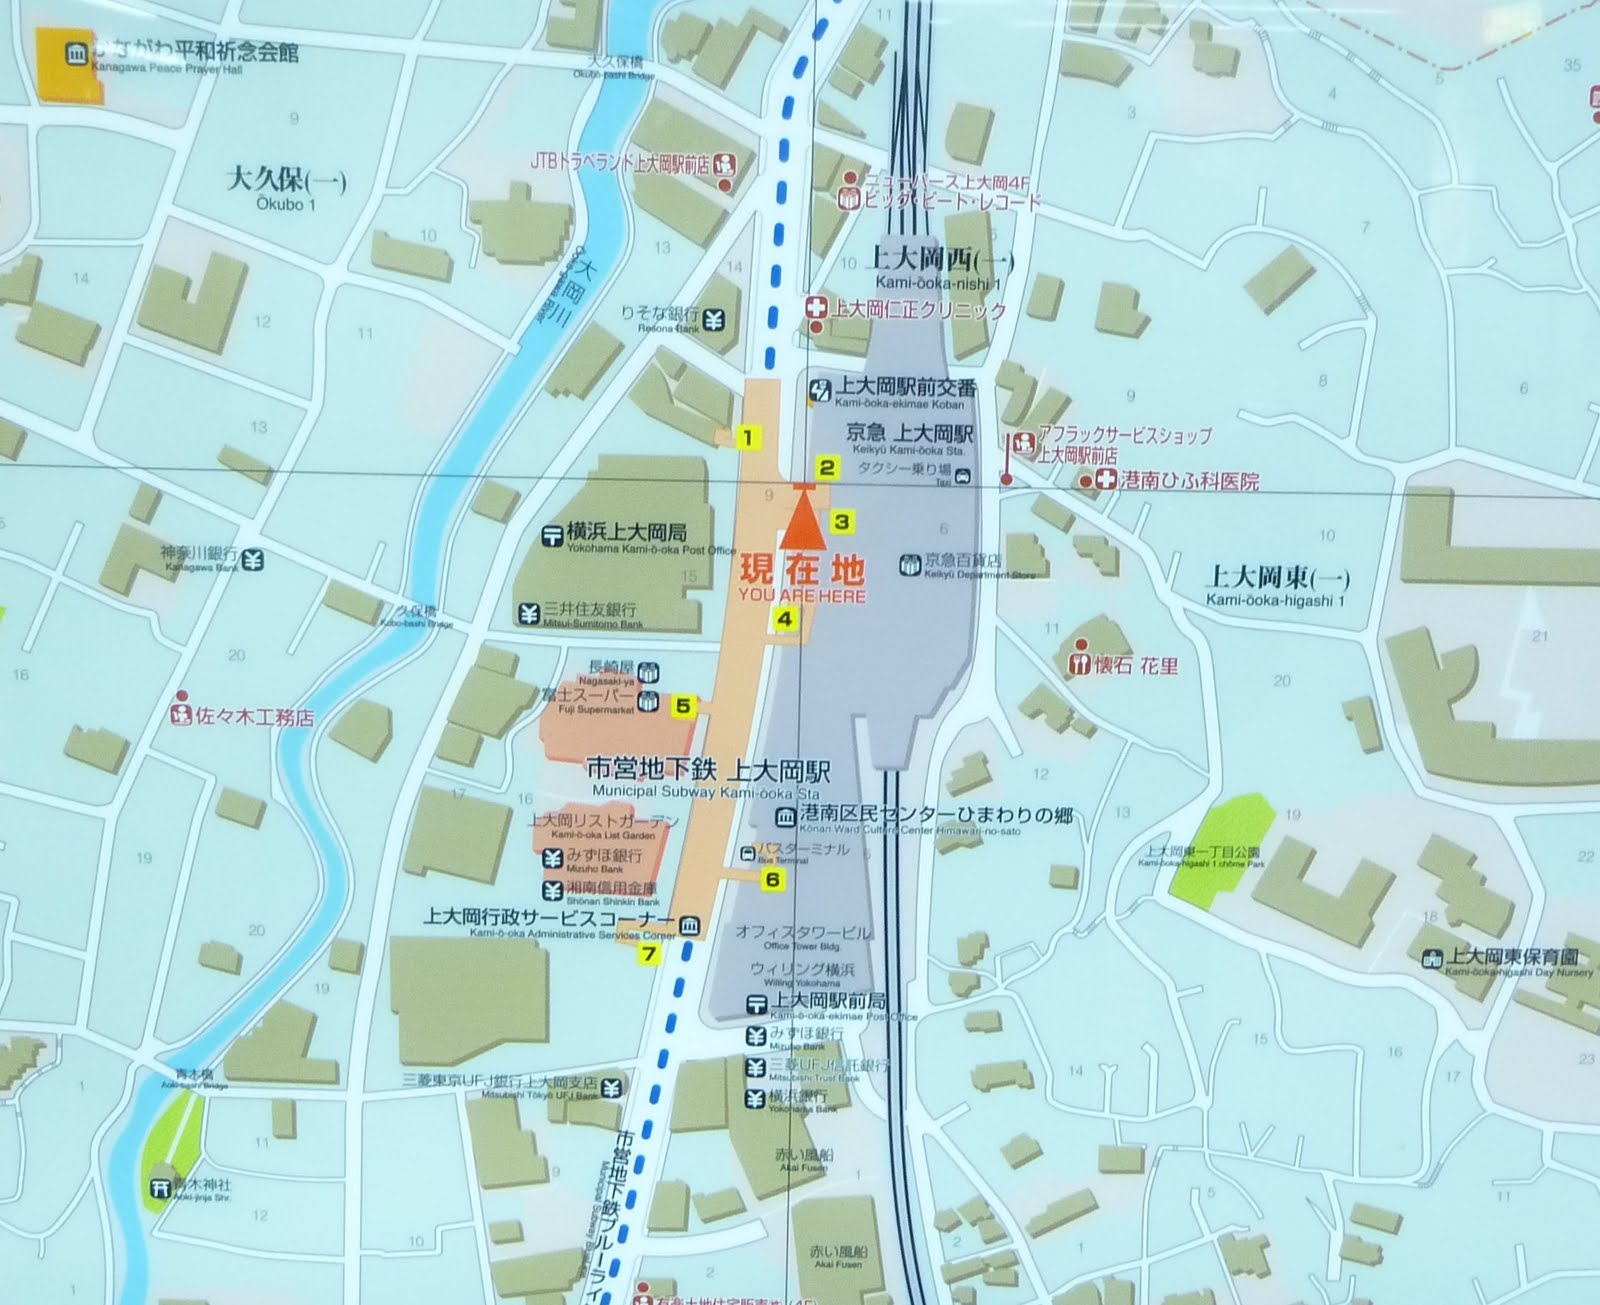
 Going over the mountain if you get lost, just look for the large KEIKYU dept building sign and it will lead you back to the station.